Sunday, January 30, 2011

Beer Gloves

These gloves (Beer Gloves by Kurt Fausset) are my new favorite knitting project.
Finished.


The pattern is written for two circular needles, but I prefer double pointed. 

I thought they looked kind of fun with the double pointed needles still in them.

I love the yarn (Lion Brand's Amazing) - really great color and texture for an inexpensive yarn.


The "Whale Spine" cable pattern cured my fear of cables.  It was very simple and easy to repeat from memory, yet resulted in such a satisfying cable!


The pattern also included a textured patch on the palm for opening twist off beer bottle caps, from wich the name of the pattern originates I assume.


I really love the gloves, but they are definitely sized for a man's hands.


Too big!

So I am going to alter the pattern to fit my hands.  I think I will also change the cable to a leafy vine pattern.  I found a pattern that I like, but have to translate it for knitting in the round with double pointed needles.  I may also try to alter the texture on the palm to provide some padding for biking.

Challenges, challenges!  I love it.  I learn so much working this stuff out on my own.

Monday, January 24, 2011

Leaf Hat: my first attempt at designing a knitting pattern!

I promised my cousin a hat for Christmas, and have not yet delivered on that promise.  But have no fear ZoĆ«, I am working out the kinks in my design and you will have your hat!


This hat was inspired by a sweater worn often by my friend Mia.  The sweater has scalloped leaves along the bottom edge that I sort of fell in love with.  There was a hat pattern that I particularly liked, but wanted to make my own, so I decided to replace the ruffle on the side with hanging leaves.  I found a pattern for the scalloped leaf edge and used some graph paper and experimenting to flip the leaves around and put two side by side.  (I probably could have found a pattern for this with some more looking, but what fun would that be?)


I added stitches to the crown of the hat to make it a little more roomy, and this is the result!  
I think it turned out pretty well, even in the cheap yarn I used for this first attempt!  I am working on the next attempt in a textured yarn and will post pictures of the finished hat.

Saturday, January 15, 2011

Worms! No really, they are neat.

As part of my DIY kick, I decided I should start recycling food waste as well as all the other stuff. And a regular old compost pile is too slow for me. Plus my tiny garage apartment is too small, with extremes of temperature, for a pet and I thought maybe worms would take the edge off my longing for something warm and fuzzy to keep me company?  Ok, maybe not.  
Anyway, I put together a small worm bin, called up a friend who has a well-established worm bin of his own and he agreed to give me some worms.  

Here are some photos documenting the process: 


small-ish rubbermade bin


 drainage hole


put a cork in it (hey, part of the fun of DIY is using what you've got!)


some shredded news print (from that christmas package!) for bedding


get it a little damp, about like a wrung out sponge
(Also, notice the vent holes I drilled along the edge. I think they are usually in the top, but I felt like putting them on the side. I figure this way if I put the bin outside it doesn't get too wet when it rains.)


Tahitian bridal veil plant in a cute tea tin, a little gift for my friend in thanks for the worms


My friend's worm bin is much more sophisticated than my little one.  He's got three layers (the top is off to the left in this photo.)


bottom layer is full of rocks for drainage


and he put in a fancy spigot 


second layer is older, with mostly just worm castings ready for harvesting


the top layer is the fresh stuff, where most of the worms hang out 


Yum!  Kind of pretty though, isn't it?


we started pulling worms from the second layer, as my friend wanted to harvest some of the worm castings to make worm tea (liquid fertilizer you can use on the garden)


the trick is to pull a bunch of the "dirt" out onto a surface in the sun


you pull layers off and the worms move down away from the light


Worm!  I named this one Violeta. 


All the plants were salivating I think. Look at how dark and rich it is!  And it didn't smell like anything.  Maybe a little like clean dirt.

So you keep pulling off dirt, looking for any stray worms, until...


you get to the ball-o-worms at the bottom.


Finished worm bin with some food scraps.

Now some might find this process a little disturbing or even gross (my friend's wife was not so into pulling the worms out of the pile, but was nice enough to take some pictures while my hands were dirty.)  I thoroughly enjoyed it!  The worms are cute little red ones, not the big slimy night crawlers you see on the sidewalk after it rains.  And the worm castings are just like nice damp rich dirt.  Growing up around gardens, I know what horticultural gold this stuff is.

So far my worms seem to be happy in their new home.  Sometimes they get agitated when they are moved and try to escape, I believe it is actually called worm run?  To guard against this I put the bin on a tray with a little water in it for the first couple days, like a mote.  I didn't want to chance waking up to small red worms all over my apartment.  But so far, no running.  Just lots of chomping.  They really like tomatoes, I discovered. Eventually I will have some great fertilizer to put on my plants!  

Tuesday, January 4, 2011

Christmas fun! Because who has time to post about it till the new year anyway?

It has been a whole month since I posted!  Stage management of a particularly ornery show ate my life, didn't even have time to do half the stuff I would have liked to for the holidays!

I did manage to get a couple of neat things made.


My favorite is this neat felt star I made for my Wisconsin family's Christmas tree:


I found this really thick felt in the arts and crafts pile at my dad's house.  I found directions for folding a 5 pointed star, and used that to make the pattern.  I cut the 5 diamonds out of the felt, then whip-stitched them together with some pretty red thread.  It turned out so well!  Because the pieces didn't quite match up perfectly, it ended up being a little convex at the center, which gave it a nice three-demensional quality.  I was so happy with it!

I also made beaded star ornaments.  

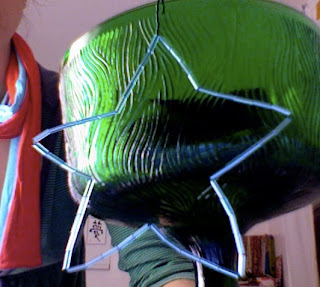
They were pretty and simple:  seed beads or bugle beads strung on wire, the wire twisted into a hook at the top.  I used up some beads I have had around for a while.  They were a particular hit with the little boys I nanny (a 3 year old and twin 6 year olds. I give their family a set of whatever ornaments I make each year instead of toys.  Who needs more plastic junk!)  They immediately discovered a characteristic I did not realize my stars possessed:  they can be ... readjusted to be any shape you want them to be!  They loved that.